Wednesday, October 24, 2012

Name and Letter Recognition

We have been working on practising name recognition/writing and upper and lower case letter recognition around here. Because the light table is such a hit, I thought we'd combine these into some fun activities.

First I wrote Caleb's name on some acetate we had around the house. I used a black permanent marker. 


Caleb was eager to 'spell' his name using some special stones. As he worked we discussed the name of the letters and how they were shaped. He was excited to see how beautiful the name became as he completed each letter.


I also used a permanent marker with some clear, decorative stones to create alphabet stones for the light table. We put them on the table in a big group and played 'I spy' together ("I spy the letter 'L'").


We then found the letters in Caleb's name and wrote that together.


He was also eager to spell his sister's name.
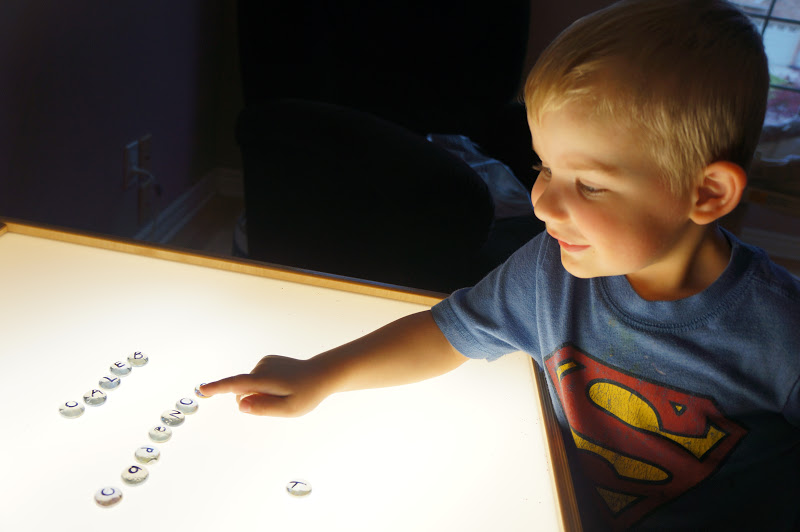

We then sorted and grouped the letters, discussing which were upper case and which were lower case.


Any of these activities would be great for children who are in need of additional support for name recognition/printing and letter recognition. Using the light table is very enticing to many - specifically those children engaging in RTI activities during small groups or playtime! 

Tuesday, October 23, 2012

Illuminated Sand Art

We found an interesting way to create art with our light table - illuminated sand creations!

Cadence drew a picture of a butterfly on a clear garbage bag using a permanent marker.

 
Once she was happy with her design, we placed the picture on the light table. Slowly and carefully she scooped and poured coloured sand onto the butterfly.


The result - a colourful picture that appeared to glow as the light from the table shone through it. Beautiful!


After we admired the picture we collected the sand in a bag and are saving it for our tactile bins - it will be fun to use with scoops and funnels!

Signs of Fall Nature Collage

Fall is our favourite time to head outdoors and enjoy the changes happening in nature all around us! Over the last few days we have spent time observing, enjoying, and gathering 'signs of fall'. We visited some of our local parks and our own backyard to gather leaves, pinecones, twigs, acorns, sticks, and flowers. Visiting many places allowed us to observe much variety in the kinds of changes happening in nature, and to collect a variety of materials.


In our own backyard we used scissors to gently remove some of the 'signs of fall' that we liked - an option not possible in the parks.


Our final collection contained a large variety of colours, shapes, and sizes of materials....it was beautiful!


We spent time placing the materials on the light table in order to explore them further. The kids immediately noticed that when the light shone through the leaves, their veins were visible. This lead to a neat discussion on how plants get the nourishment they need in order to thrive, and a comparison of the various leaves we collected.


After a while Cadence began to use the materials to create pictures. Can you see the girl holding the flowers in the picture below?


After observing the materials on the light table I wanted to encourage the children to create a nature collage on the back windows that they could enjoy over the next few days. I thought that placing the collage on the window would allow the natural outdoor lighting to filter through the objects, similar to the effects of the light table, and it would help beautify that space in our house. I used sticky contact plastic (from the local dollarstore) and adhered the plastic so the sticky side faced outwards. The children each had their own pane of glass and carefully selected items from our 'signs of fall' collection.


The final product! We left the materials on our doors for one week. It was interesting to see how they eventually dried out as time went on, leading to more discussions about the needs of living things.


Monday, October 8, 2012

Spider Web Playscape

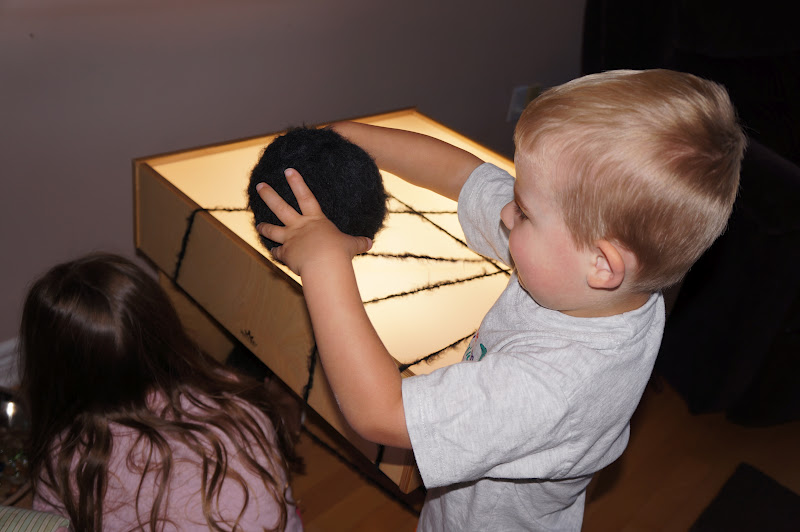
My children have been very interested in spiders lately. We have noticed so many webs in our gardens, especially in the morning when they are covered with dew. I thought it would be fun to use some black yarn and plastic spiders in order to turn our light table into a spider playscape. It was so easy to do!

First I tied the loose end of the yarn to one of the table's legs.


I modeled how my children could wind the yarn around and across the table, weaving it in and out in order to make a unique web. We ended up using two balls of yarn - one for each child - but if you are doing this with a larger group of children you might consider using only one ball and encourage the children to problem solve how they might take turns creating one web together.


This activity took a lot of coordination as each child needed to figure out how to wind the yarn around and across the large table, while keeping it tight enough to retain the 'web like' appearance. They also needed to work together. A few times they ended winding each other into the web and had to figure out how to cooperatively create the playscape.


As my children worked, they began to notice and name the shapes they saw in the web. They also realized that the sides of the table were beginning to look like they were covered in webs too, opening up the possibilities for the play space.


Once they were happy with the web, we added plastic spiders (found as Halloween rings at the local dollar store). I was pleased to see that neither child was reluctant to handle the very realistic looking spiders. I'm hoping it helps them feel even more comfortable with creepy crawlies when they encounter them in real life.


Such an easy way to use little materials and a light table to inspire creative dramatic play. Our spiders had all sorts of adventures on and around the table. Tomorrow I'm going to read some books about spiders and encourage my children to retell the texts on the table.


Friday, September 28, 2012

Painting with Frozen Water

We added food colouring to our ice cube trays and froze colourful ice cubes in order to encourage some scientific art making outside in the warm sun. Using a long piece of white paper and the ice cubes, I encouraged my children to spend time 'painting' with the ice. 


They noticed as the warm air melted the ice, the colour was left on the paper. By moving the ice in different ways, the markings on the paper were like those left by a paintbrush or other art making tool.


My children wanted to know why the ice was melting and this lead to a great discussion about the properties of matter and how water can be a solid, liquid, or gas.


I was amazed at just how beautiful this artwork was when the kids were finished. The colours bled into one another and created new colours. Coloured ice cubes are fun to paint with, but also great when incorporated into water table play or used for fun in the bath tub!


Tuesday, September 25, 2012

Exploring Sunflowers

Over the summer we grew a large striped sunflower plant in our garden. After the seeds had developed and the flower wilted, we dried out the head of the plant in our house. This week I thought it would be fun to let the kids explore the seeds a little further.


Using tweezers I encouraged them to dissect the plant, one seed at a time. While they did this we discussed how plants have a life cycle (seed to plant to seed) and how our food comes from plants.


Using the tweezers also helped my children develop good fine motor control - a great skill especially for Caleb as he practices his pincher grasp, which is essential for writing skills later on.


It was interesting to see what the sunflower looked like as the seeds were removed. Lots of conversation occurred as we described the way the sunflower looked!


Once we were done picking seeds we added them (along with the sunflower head and remaining seeds) to our platform bird feeder.


It didn't take long for some hungry visitors to discover the new treats awaiting them!


Sunday, September 23, 2012

Autumn Stamping

Mini cookie cutters are such an easy way to encourage children to explore print making! We used some small leaf cutters that I picked up at a local craft store over the weekend. Because print making doesn't use a lot of paint, we separated small amounts by placing it in a muffin tin.


Cookie cutters are easy for little fingers to grasp and make beautiful prints on paper.


We're going to use our finished art to make autumn cards to send to our relatives. You can also stamp plain paper gift bags in order to encourage your child to gift his/her art making to others!

Related Posts Plugin for WordPress, Blogger...